Masonary walls made easy!
Check
out my rockwork VCD! that plays in computers and dvd players
Here is my cold stony heart! July 2004
Click on the picture below for more walls and
how to details)
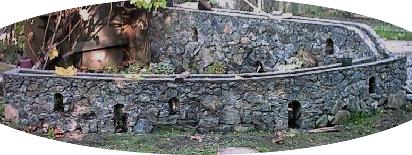
New 28th april 01 Stone
Birdhouses
Masonary walls made easy!
Check
out my rockwork VCD! that plays in computers and dvd players
Here is my cold stony heart! July 2004
Click on the picture below for more walls and
how to details)
New 28th april 01 Stone
Birdhouses
For more information or to suggest improvements
email
Brian
white
Masonary is a
lot easier than most people think. If you want to try yourself but feel
intimidated by all the technology and expertise involved, then you have
made a good choice by coming here. I work for a masonry company in Victoria.
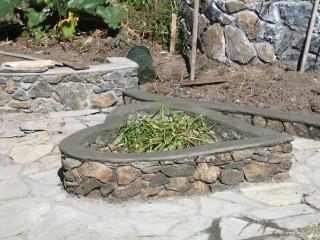
I did the one below for myself. It has plants (just started them dec 2003) in the "windows"
Commercial masonry isnt this!
But you are just limited by your imagination!
EARTH AS THE BINDER This is for
practice and to build up your confidence.
The same basic technique is used
and the end result is a little less durable but it lives! Your garden will
benefit from rock walls of this type too! All sorts of plants and animals
can live on this type of wall Living
wall Pics. Succulents,
mosses and some herbs evolved just for this.
Equipment needed A
trowel, hammer, some nails, fine soil, a pail and some water, wooden posts
and a level and some line or string is all that you need to make
a retaining wall. With soil as the binder, you should put a limit of about
3 feet (90 cm on the height. Straight lengths are made using 2 posts and
stringline top and bottom for guidance. The face of the stones are put
out as far as the string line and never further. Run your eye from one
string to the other to check. The general alignment of the stone
is with the strings. See diagram
To make the earth binder you mix
fine soil in a pail or wheelbarrow with water to make a fairly stiff mix,
not runny. Apply to the top of the wall before you add the next stone,
set the stone in place, jiggle it to the exact spot and carry on.
The stiffer the mix, the higher
you can go. Using the 2 stringlines and bringing the stones to the line
is one of the keys to building a neat wall.
Curves. Curves are hard and usually
require a mason to do a whole lot of level work, check, recheck, adjust
and have a very good eye. Mostly they draw a curve on the ground and simply
work up from there to the top of the wall. I do not
recommend that to you! It takes years of practice to do this well.
My workaround
is
to use 2, 3, or more poles and fairly stiff plastic pipe or small diameter
steel bars to mark the curve. The poles are put in place along the curve,
the plastic or steel is attached to the poles top and bottom and bent into
the correct curve . Then the steel or plastic is used as an eye guide just
as the stringline was used for the straight wall.
Cement:sand mix for retaining walls
You should be quite safe with a mix of 4 shovels of coarse sand to one
shovel of cement. Remember that you are making mortar
not concrete! Mortar is generally made as a dryish
mix. We often mix in a wheelbarrow if we are on small jobs and first you
mix the sand and cement together dry until they are evenly blended together.
Then slowly add water. Mix it all up and when your mixture resembles moist
soil and the shovel smears the surface as you cut through it, you stop
adding water. It might seem strange but that mix makes good mortar. This clip shows that perfect mix about 30 seconds into the video!
It
is sticky, it cusions the rocks as you add them to the wall, and you can
easily compress it with a trowel or your (gloved) fingers into the joints
in the rock. If you use a wet mix, it takes longer to set and (especially
on small jobs) you get very little done in a day. Once again, you are not
trying to make concrete! The dryer mix gives you the cussioning effect
(also when the cement hardens), workability and a mix which is less corosive.
If you work with a very wet mix and and even one hole in your gloves,
the cement damages your skin and you will know about it!. People often
work with the dry mix without gloves. You should be quite safe
if the base of a retaining wall ia half as wide as it is high. For instance,3
feet wide at the base if it is 6 feet high. See
diagram
How to make columns and pillars
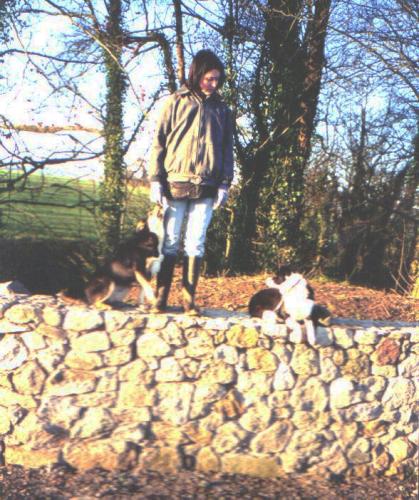
My wall was a rubble wall. There are other choices. Check
out this wall for a different style!